|
You’ve decided to take on the task of paver installation yourself, and you’re looking for a guide to help you use an angle grinder to cut pavers. It can be tough to find good information on how to do something, especially when it’s a job that requires special tools or skills. But never fear. In this guide, you will find in-depth information about how to use an angle grinder, what blade to use, and the safety precautions you should take when using an angle grinder. What Tools Do I Need?It is a wise idea to have all of the following tools on hand before starting your project. These tools will help you to use the angle grinder to cut pavers more easily and safely.
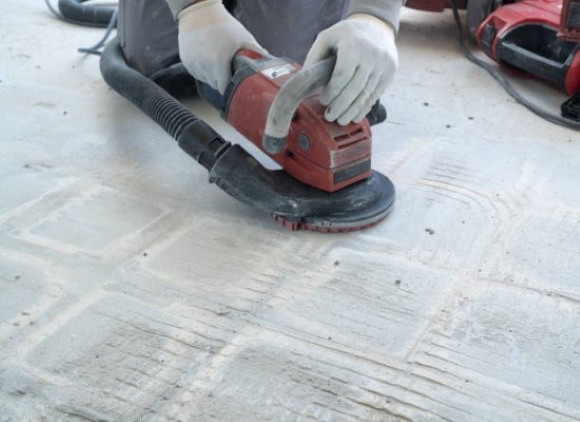
How to Cut Pavers with an Angle Grinder: Step-By-Step InstructionsAn angle grinder is a powerful tool that can be used to cut pavers. However, it is important to take safety precautions before using an angle grinder. In this section, we will provide step-by-step instructions on using an angle grinder to cut pavers. Step 1: Put on Your Safety GearBefore you start cutting pavers, make sure you put on your safety gear. This includes safety goggles, ear protection, and a dust mask. It's also an excellent idea to wear gloves to protect your hands from flying debris. Step 2: Prepare the AreaBefore you begin laying pavers, it is necessary to prepare the area where you will be working. Make sure that there is plenty of space for you to move around and that the area is well-ventilated. It is also a good idea to cover any nearby surfaces with a drop cloth to protect them from flying debris. Step 3: Choose the Right Blade for the JobThe type of blade you use will depend on the material of your pavers. For example, if you are cutting concrete pavers, you will need a different blade than the one you use to cut clay pavers. Here is a quick guide to help you pick the right blade based on your needs: Concrete Pavers:Use a diamond blade that is specifically designed for cutting concrete. It is important to get a blade with the correct diamond grit for the job. For pavers made of concrete, purchase a blade with coarse diamond grit. Clay Pavers:Use a carbide-tipped blade. This type of blade will stay sharp longer than a regular steel blade and will cut through clay pavers more easily. Step 4: Cut the Pavers
Once you have chosen the right blade and prepared the area, you are ready to start cutting pavers. Begin by holding the angle grinder with both hands and position the blade on the paver that you want to cut. Then, apply pressure to the paver and move the blade back and forth to cut through the paver. Be sure to keep your hands away from the blade as it is cutting through the paver. Step 5: Clean UpOnce you have finished cutting all of the pavers, it is time to clean up the area. Be sure to remove any debris from the surface of the pavers. You may also want to use a vacuum cleaner to remove any dust that has been created by cutting the pavers. That’s it! You now know what to do when cutting pavers. Don't forget to take all precautions necessary to keep yourself safe and make sure you use the right blade. ConclusionWith this knowledge, you understand the angle grinder paver cutting process, and you can tackle your paver project with confidence. Just be sure to follow all safety precautions and use the right blade for the job. We hope that this guide has been helpful. So, waste no more time and get started on your project today.
0 Comments
You just bought a new angle grinder but didn’t know how to put the blade on it. It’s not hard to do, but if you’re not sure how to do it safely, you could end up hurting yourself. Additionally, if you don’t mount the blade correctly, it could come flying off while you’re using it and cause serious injury. We are here to help you avoid those pitfalls and learn how to put a blade on an angle grinder the right way, so let’s get started. What Tools You Will NeedIt’s a good idea to have all the tools you need before you start any project, and this one is no different. For this project, you will need:
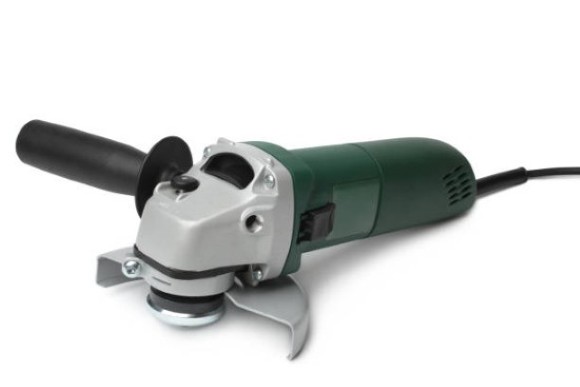
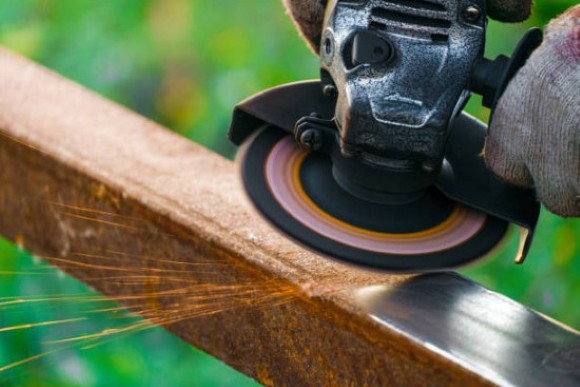
How to Put a Blade on an Angle Grinder Harmlessly: Step-By-Step GuideAn angle grinder is a versatile tool that can be used for a variety of projects, such as cutting, grinding, and polishing. You can use it on metal, concrete, tile, and more. Before you can start connecting the blade, you need to take some safety precautions. Put on your safety goggles and gloves. It’s also wise to wear a dust mask to avoid inhaling any particles. The following steps will assist you in putting the blade on an angle grinder: Step 1: Read the ManualThe first thing you should do before putting a blade on your angle grinder is to read the manual. Every model is different and has its own quirks, so it’s important that you know how yours works. This will also help you understand what safety features are included with your particular model. Step 2: Inspect the GrinderOnce you’ve read the manual, it’s time to inspect your angle grinder. Make sure that there is no damage to the housing or cord. If you see anything that looks damaged, do not use the grinder. It is also essential that you make sure that it is secure and in good condition. The blade guard is there to protect you from the blade, which is why you should make sure it is not damaged in any way. Step 3: Select the Appropriate BladeNot all blades are created equal, and some are better suited for different tasks than others. There are three main types of blades available for use with an angle grinder:
Step 4: Attach the Blade
Once you’ve selected the appropriate blade, it’s time to attach it to the angle grinder. If your model uses bolts, you’ll need to use a hex key or Allen wrench to tighten them. You don’t want to over tighten the bolts, as this could damage the blade or cause it to come loose while you’re using the grinder. Step 5: Install the Blade GuardThe final step is to install the blade guard. You should install the blade guard correctly if you want to be protected from the blade. Make sure that the grinder guard is secure and functioning properly before using the grinder. These are the steps that you need to follow in order to assemble an angle grinder cautiously. ConclusionNow you know the steps for safely mounting a blade to an angle grinder. Be sure to follow the steps outlined in this article, and always wear safety gear when using an angle grinder. We hope you found this article helpful. So what are you waiting for? Go put the blades on your electric angle grinder and get to work.
Changing the blade on a DeWalt angle grinder can be painful, especially if you don't know where to start. You could easily cut yourself if you're not familiar with the process. DeWalt angle grinders are a popular choice for grinding and cutting metal. They come with a variety of different blades to choose from, depending on the job at hand. In order to keep your Dewalt angle grinder in good condition, it is important to know the way to change the blade when needed. This guide will teach you how to change the blade on a Dewalt angle grinder, step-by-step. We're the Tools Auditor Team and offer impartial, in-depth reviews of hand-tools such as power tools, hand tools, and machinery from top tool makers. We offer user-generated content which includes reviews and ratings. Instructions for Changing the Blade on a Dewalt Angle GrinderChanging the blade on a DeWalt angle grinder is a relatively simple process that can be completed in just a few minutes. Just follow these steps: What You Need:
Instructions: 1. Remove the Battery or Unplug the Angle Grinder:Remove the battery from the angle grinder or unplug it from the power source before beginning any work. This is an important safety precaution that will help to avoid any accidents. If the angle grinder is battery-operated, make sure that the battery is completely disconnected from the power source. 2. Loosen the Blade Nut:Use a Phillips head screwdriver to loosen the blade nut that is located at the base of the blade. You may need to use a flathead screwdriver to help loosen the nut. That's why it's a good idea to have both types of screwdrivers on hand. 3. Remove the Old Blade:Once the nut is loose, you can remove the old blade from the angle grinder. Be sure to dispose of the old blade properly. If the blade is damaged, do not attempt to reuse it because it could break and cause serious injuries. 4. Install the New Blade:To install the new blade, simply reverse the steps that you use to remove the old blade. Insert the new blade into the angle grinder. Then, use the screwdriver to tighten the blade nut. Be sure not to over-tighten the nut, as this could damage the blade or the angle grinder itself. 5. Test the Angle Grinder:Before using the angle grinder again, be sure to test it out in a safe area. If everything appears to be working properly, you can begin using the tool as usual. Be sure to wear safety goggles and a dust mask when changing the blade on your DeWalt angle grinder. This will help to protect you from flying debris or dust. Also, be sure to follow the manufacturer's instructions for changing the blade. If you are unsure about anything, it is always best to consult with a professional before proceeding. Final ThoughtsNow that you know how to change the blade on a DeWalt angle grinder, you can get back to work quickly and easily. Be sure to follow all safety precautions when working with power tools, and always wear proper eye and ear protection. With just a few simple steps, you'll be backing up and running in no time. Thanks for reading.
|